Hashicorp Vault
Managing your secrets and sensitive data.
Introduction
Vault https://www.hashicorp.com/products/vault/ is an open-source tool used for securely storing and managing secrets. Vault can be managed through the CLI, HTTP API, or GUI.
Access
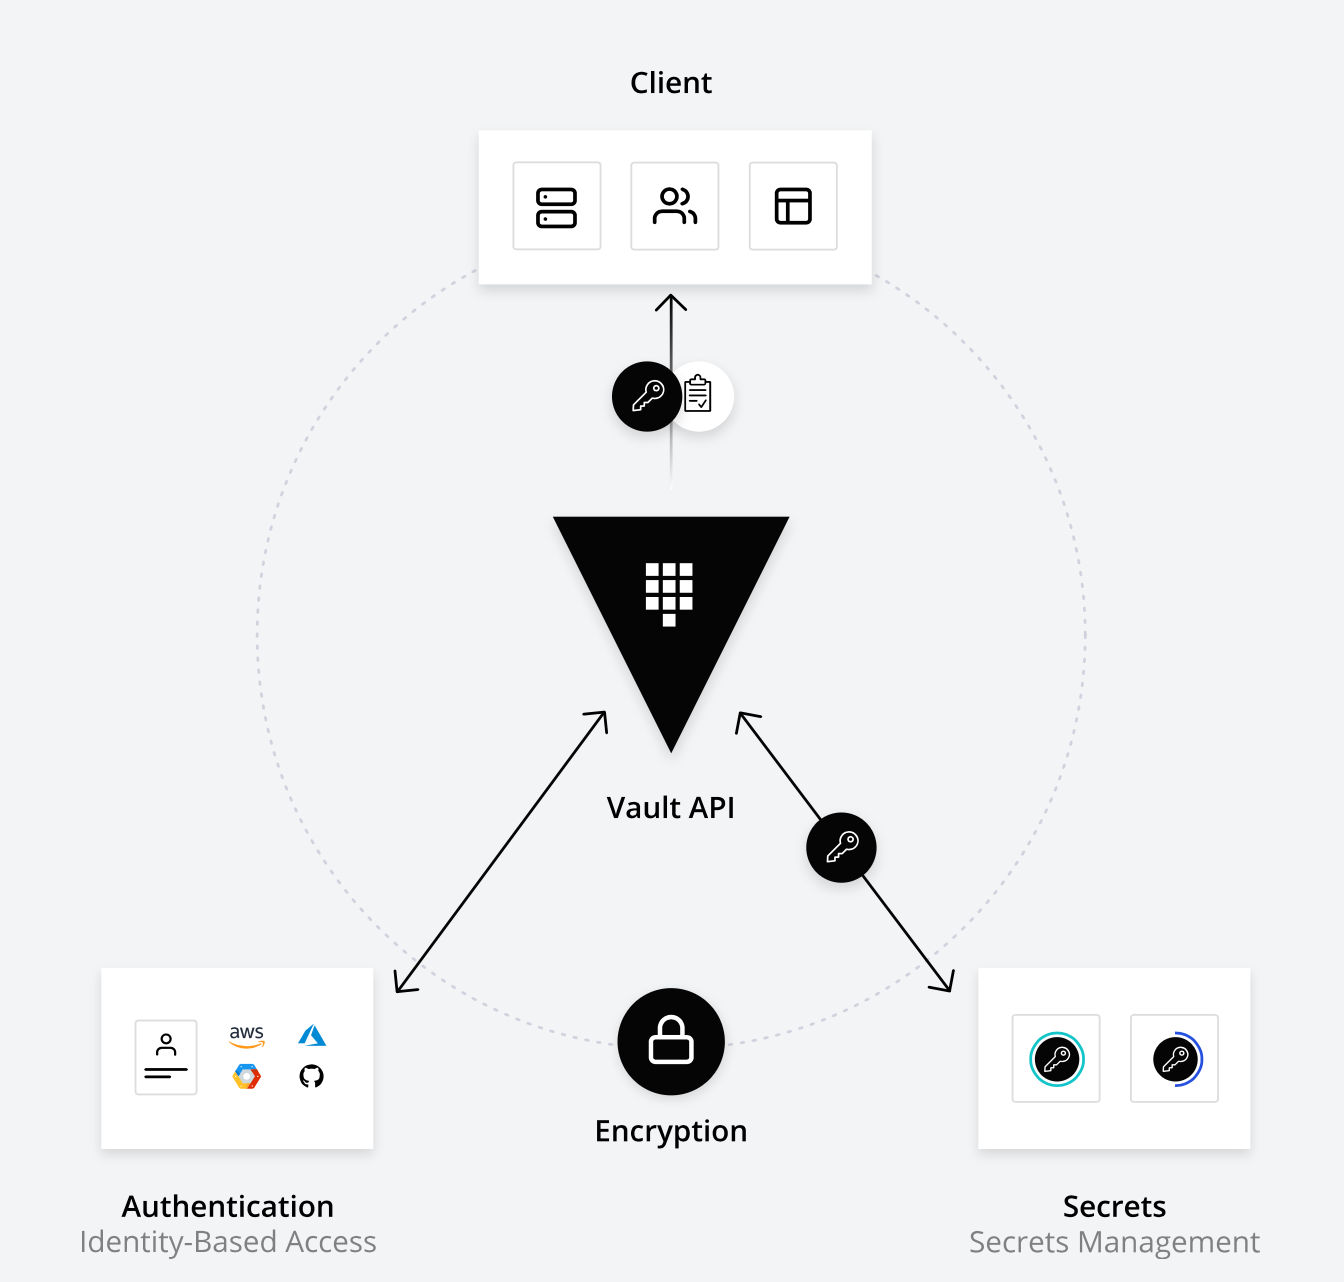
There are three way to interwork with Vault: CLI, API, and GUI (if enabled).
CLI
For example, using the cli access you can create a new secret with a keys of username and password, and values of operator and changeme within the secret/customer1 path:
vault kv put secret/customer1 username=operator password=changeme

Success! Data written to: secret/customer1
GUI
Similarly, Vault listens on https://Vault_IP:8200
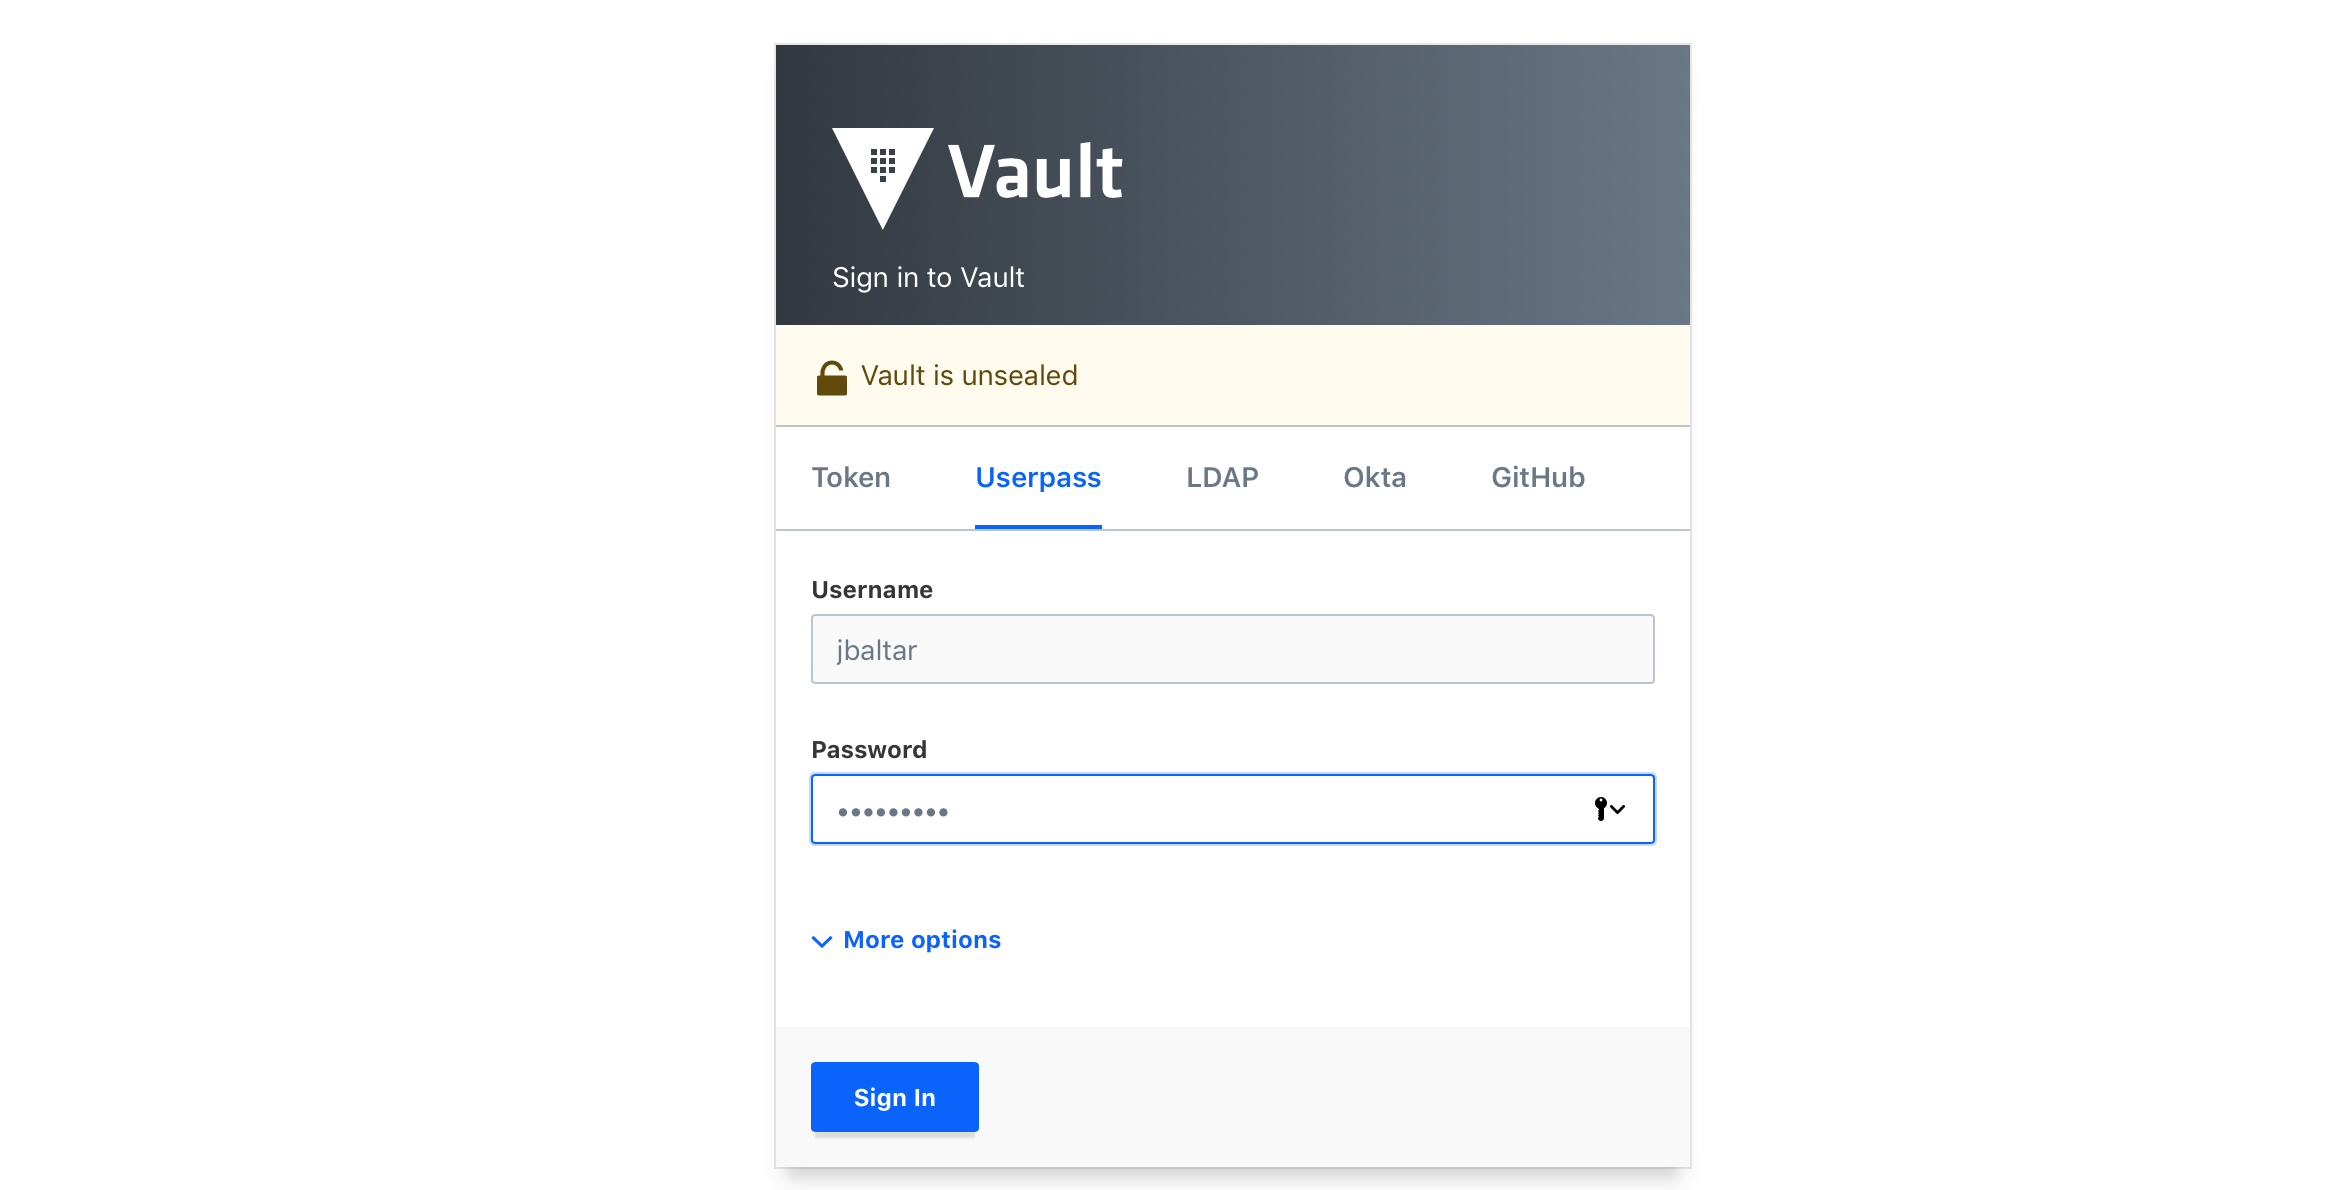
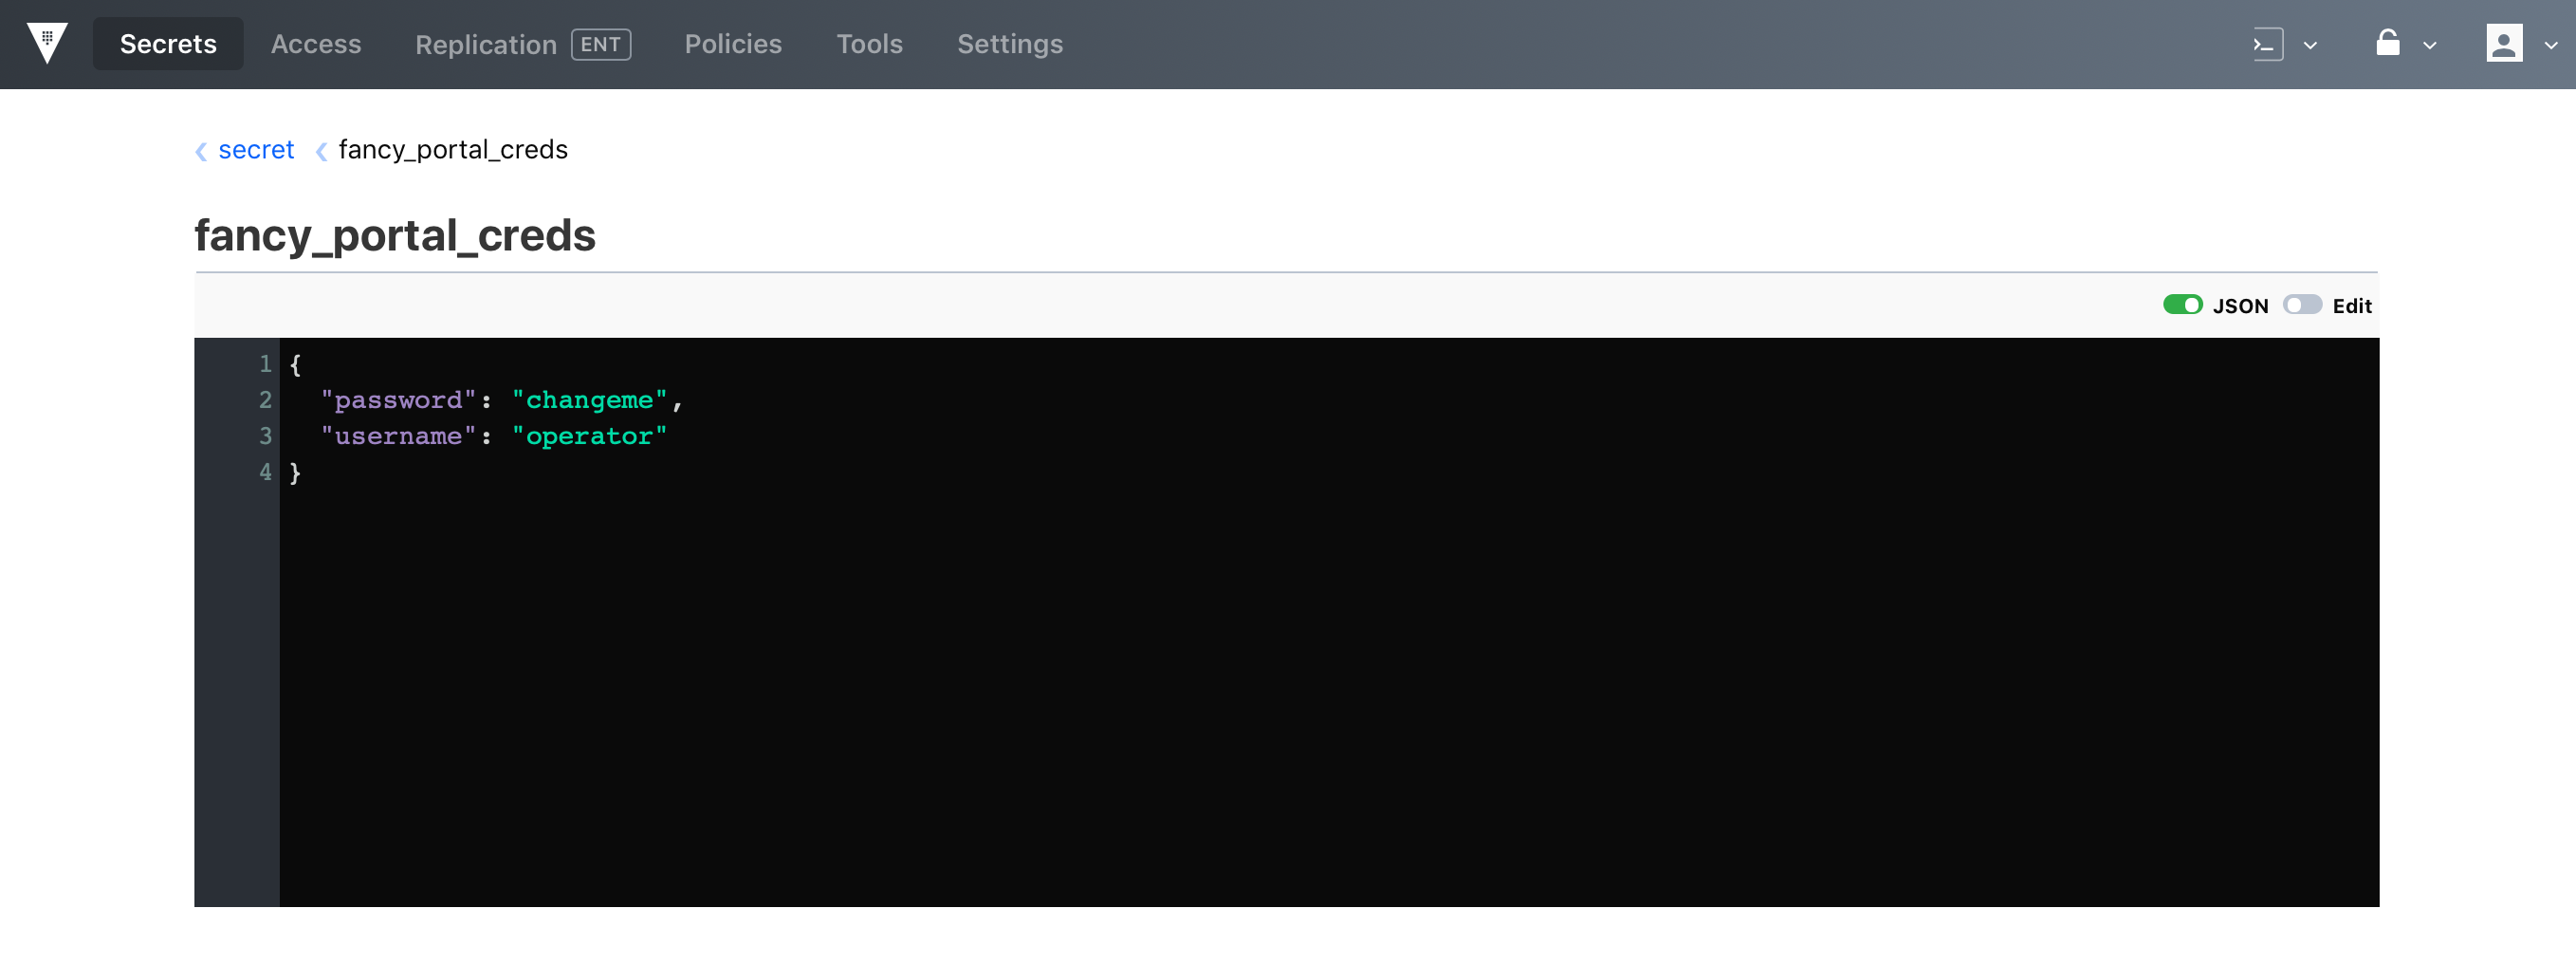
Admins and user can access the GUI to configure and browse secrets as shown below:
API
Vault also provides an API interface. The command below is reading the values from “fancy_portal_creds” secret via API.
curl \
    -H "X-Vault-Token: $VAULT_TOKEN" \
    -X GET \
    http://127.0.0.1:8200/v1/secret/fancy_portal_creds

{"request_id":"be708e00-2e4c-3650-a5e4-cf2a22252639","lease_id":"","renewable":false,"lease_duration":2764800,"data":{"password":"changeme","username":"operator"},"wrap_info":null,"warnings":null,"auth":null}
Secret Types
There are two types of secrets in Vault: static and dynamic. Static secrets that can have refresh intervals but they do not expire unless explicitly revoked. They are defined with the key and value backend. Dynamic secrets are generated on demand. They generally expire after a short period of time. Since they do not exist until they are accessed. Vault ships with a number of dynamic backends such as AWS, databases, Google Cloud, etc.
Storage Backends
The storage backend is used to persist Vault’s data. Several backends are supported such as AWS S3, MySQL database, etc. Filesystem The “vault-config.json” file should look as follows. The data is stored in the /data folder.
{   "backend": {
       "file": {
          "path": "vault/data"
       }
    },
       "listener": {
       "tcp":{
         "address": "0.0.0.0:8200",
           "tls_disable": 1
       }
},   "ui": true
}
AWS S3
To use AWS S3 as backend storage, you just need to change the vault-config.json file as per details below.
storage "s3" {
  access_key = "abcd1234"
  secret_key = "defg5678"
  bucket     = "my-bucket"
  kms_key_id = "001234ac-72d3-9902-a3fc-0123456789ab"
}
AWS DynamoDB
Similarly, you can use AWS DynamoDB to store Vault data.
storage "dynamodb" {
  table = "my-vault-data"

  read_capacity  = 10
  write_capacity = 15
}
This is the DynamoDB table schema required.
resource "aws_dynamodb_table" "dynamodb-table" {
  name           = "${var.dynamoTable}"
  read_capacity  = 1
  write_capacity = 1
    hash_key       = "Path"
    range_key      = "Key"
    attribute      = [
        {
            name = "Path"
            type = "S"
        },
        {
            name = "Key"
            type = "S"
        }
    ]
  tags {
    Name        = "vault-dynamodb-table"
    Environment = "prod"
  }
}
Google Cloud Storage
Please find details at: https://www.vaultproject.io/docs/configuration/storage/google-cloud-storage.html
Consul
Please find details at: https://www.vaultproject.io/docs/configuration/storage/consul.html
##Installation For this post, I have deployed Vault using a Docker compose environment.
# base imageFROM alpine:3.7

# set vault version
ENV VAULT_VERSION 0.10.3

# create a new directory
RUN mkdir /vault

# download dependencies
RUN apk --no-cache add \
bash \
ca-certificates \
wget

# download and set up vault
RUN wget --quiet --output-document=/tmp/vault.zip https://releases.hashicorp.com/vault/${VAULT_VERSION}/vault_${VAULT_VERSION}_linux_amd64.zip && \
unzip /tmp/vault.zip -d /vault && \
rm -f /tmp/vault.zip && \
chmod +x /vault

# update PATH
ENV PATH="PATH=$PATH:$PWD/vault"

# add the config file
COPY ./config/vault-config.json /vault/config/vault-config.json

# expose port 8200
EXPOSE 8200

# run vault
ENTRYPOINT ["vault"]
The docker-compose.yaml file orchestrates the deployment.
docker-compose.yaml
version: '3.6'

services:

  vault:
    build:
      context: ./vault
      dockerfile: Dockerfile
    ports:
      - 8200:8200
    volumes:
      - ./vault/config:/vault/config
      - ./vault/policies:/vault/policies
      - ./vault/data:/vault/data
      - ./vault/logs:/vault/logs
    environment:
      - VAULT_ADDR=http://127.0.0.1:8200
    command: server -config=/vault/config/vault-config.json
    cap_add:
      - IPC_LOCK
Initializing and Unsealing
Once Vault is installed, you have to initialise and unseal it. First step is to initialise your deployment by issuing the “vault operator init” command. The output lists the initial root token and 5 keys to unseal Vault.
vault operator init

Unseal Key 1: JZJrimHo8+6wuAomd3WMipzZqmmIakH/5Q5+Wk66ucnk
Unseal Key 2: YrarOAkcdnvhIUM4fhC9V12Z9b1dWjgYICpxpaiorUYd
Unseal Key 3: 4SWhMBYssCUq3evnZRftQTFI2kI+WjgxBRq+3aVVkMNV
Unseal Key 4: zrtrGRshH8elU9S7LE7bKA0Ww79rFxuctQPWgeyNuPlC
Unseal Key 5: NaPsnr3x+ITuM0kys8U8G6zZ9TqGfiWfi0vjQoMN4sIt

Initial Root Token: 52c32e6b-6e9d-e1cf-409d-1fd8295c2d4e

Vault initialized with 5 key shares and a key threshold of 3. Please securely
distribute the key shares printed above. When the Vault is re-sealed,
restarted, or stopped, you must supply at least 3 of these keys to unseal it
before it can start servicing requests.

Vault does not store the generated master key. Without at least 3 key to
reconstruct the master key, Vault will remain permanently sealed!
It is possible to generate new unseal keys, provided you have a quorum of
existing unseal keys shares. See "vault operator rekey" for more information.
Now you can unseal Vault using three of the keys. Run this command two more times, using different keys each time. Once done, make sure Sealed is false:
vault operator unseal
Unseal Key (will be hidden):


Key             Value
---             -----
Seal Type       shamir
Sealed          false
Total Shares    5
Threshold       3
Version         0.10.3
Cluster Name    vault-cluster-b6e1c234
Cluster ID      929cd1fc-07e9-e013-9064-42dc42e56c34
HA Enabled      false
Now, you can authenticate using the root token.
vault login

Token (will be hidden):

Vault is now ready for use.
Enabling secrets engine
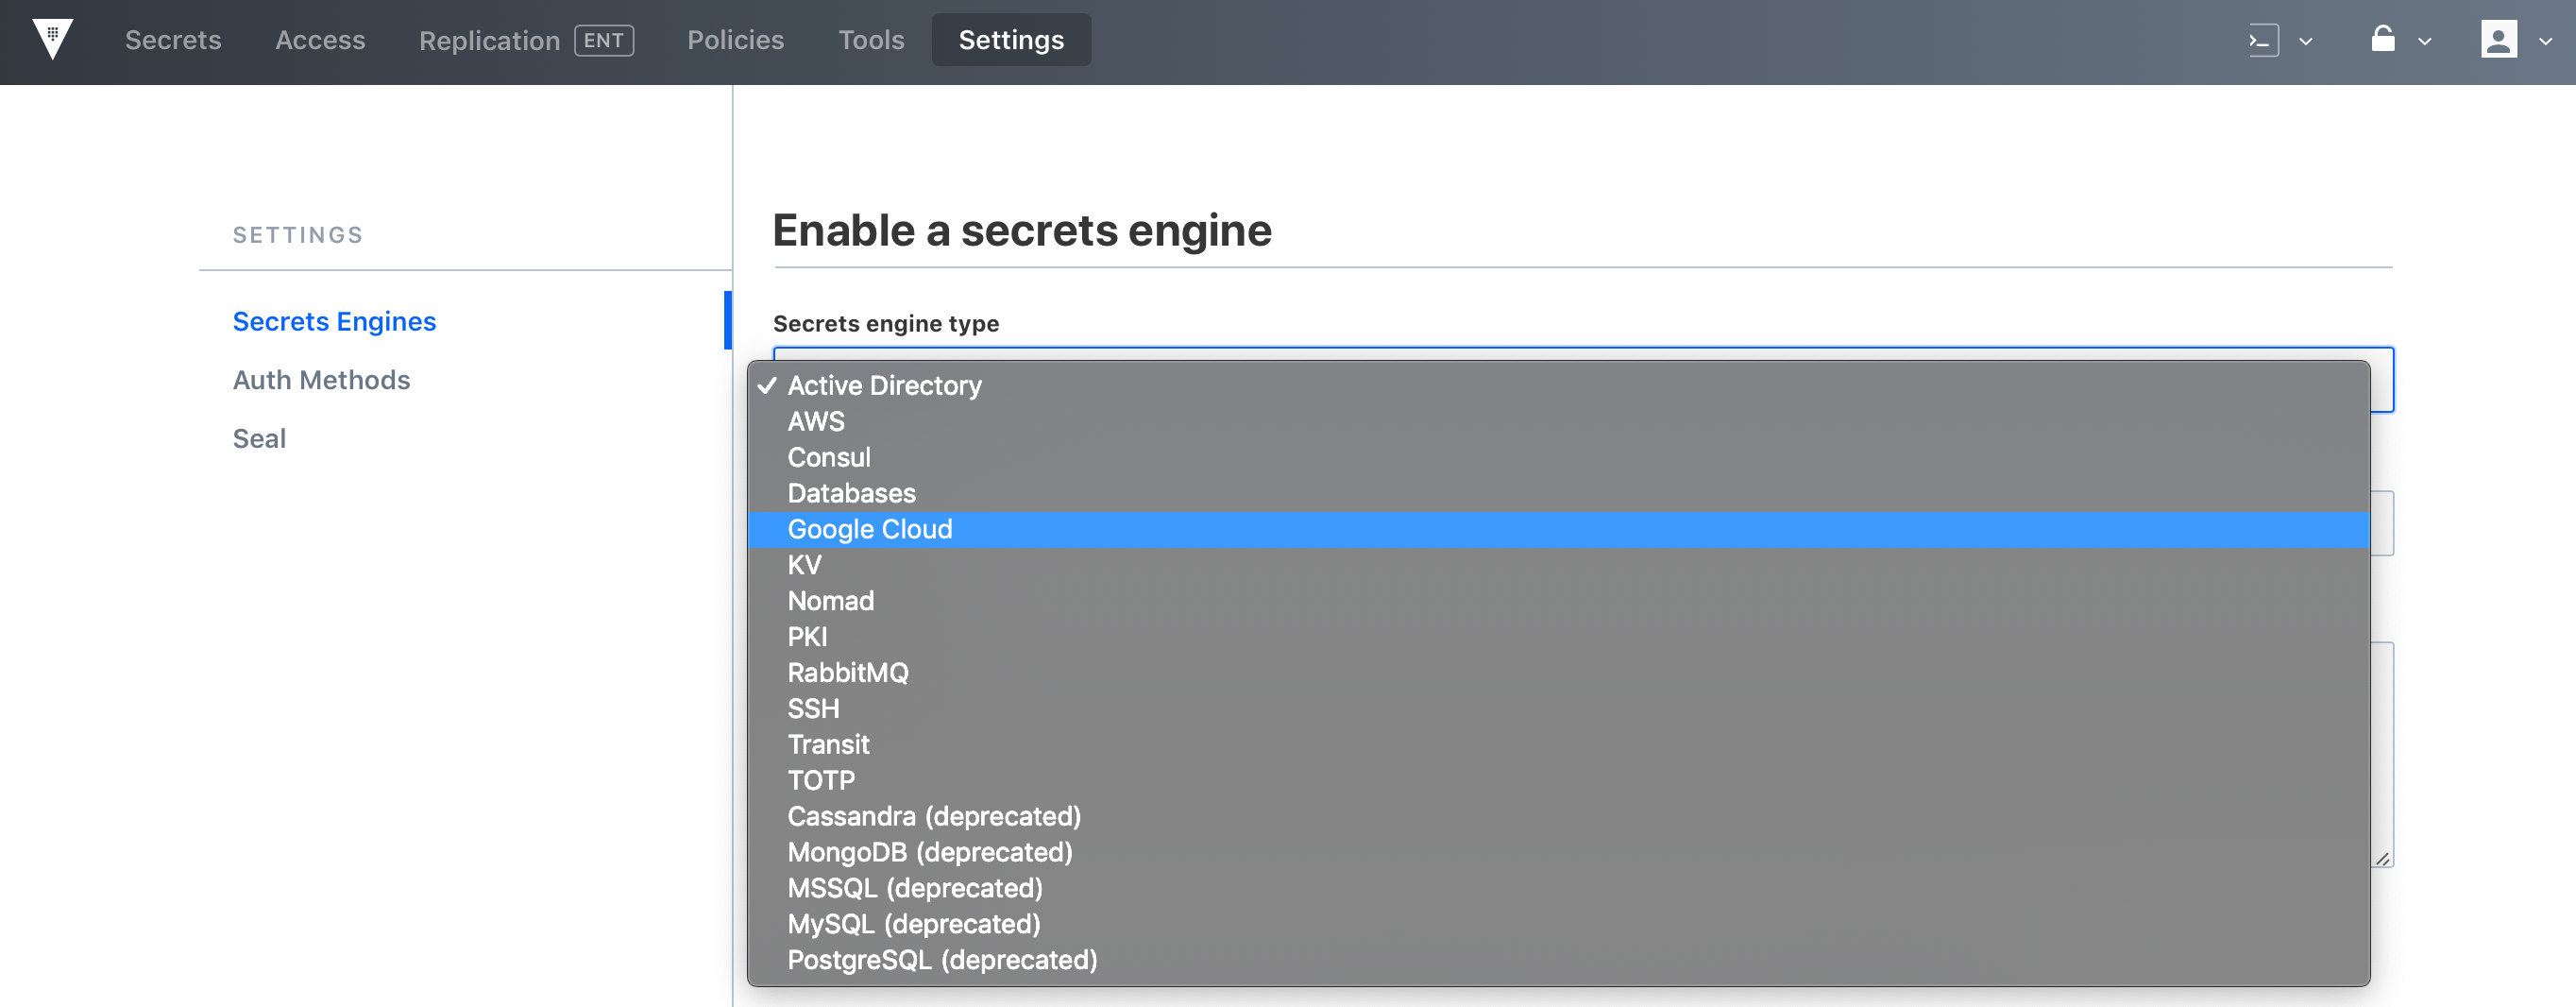
Secrets engines can be enabled via CLI, API or GUI. In this example, accessing the GUI, clicking on Settings > Secrets Engine, the list of available engines is displayed.
Policies
Policies in Vault control what a user can access. There are some built-in policies that cannot be removed. For example, the root and default policies are required policies and cannot be deleted. The default policy provides a common set of permissions and is included on all tokens by default. The root policy gives a token super admin permissions, similar to a root user on a linux machine.

Creating a Policy
First, you have to create your .hcl format policy file as shown below:
my-devops-policy.hcl
cat my-devops-policy.hcl

path "secret/*" {
  capabilities = ["create"]
}
path "secret/*" {
  capabilities = ["read"]
}
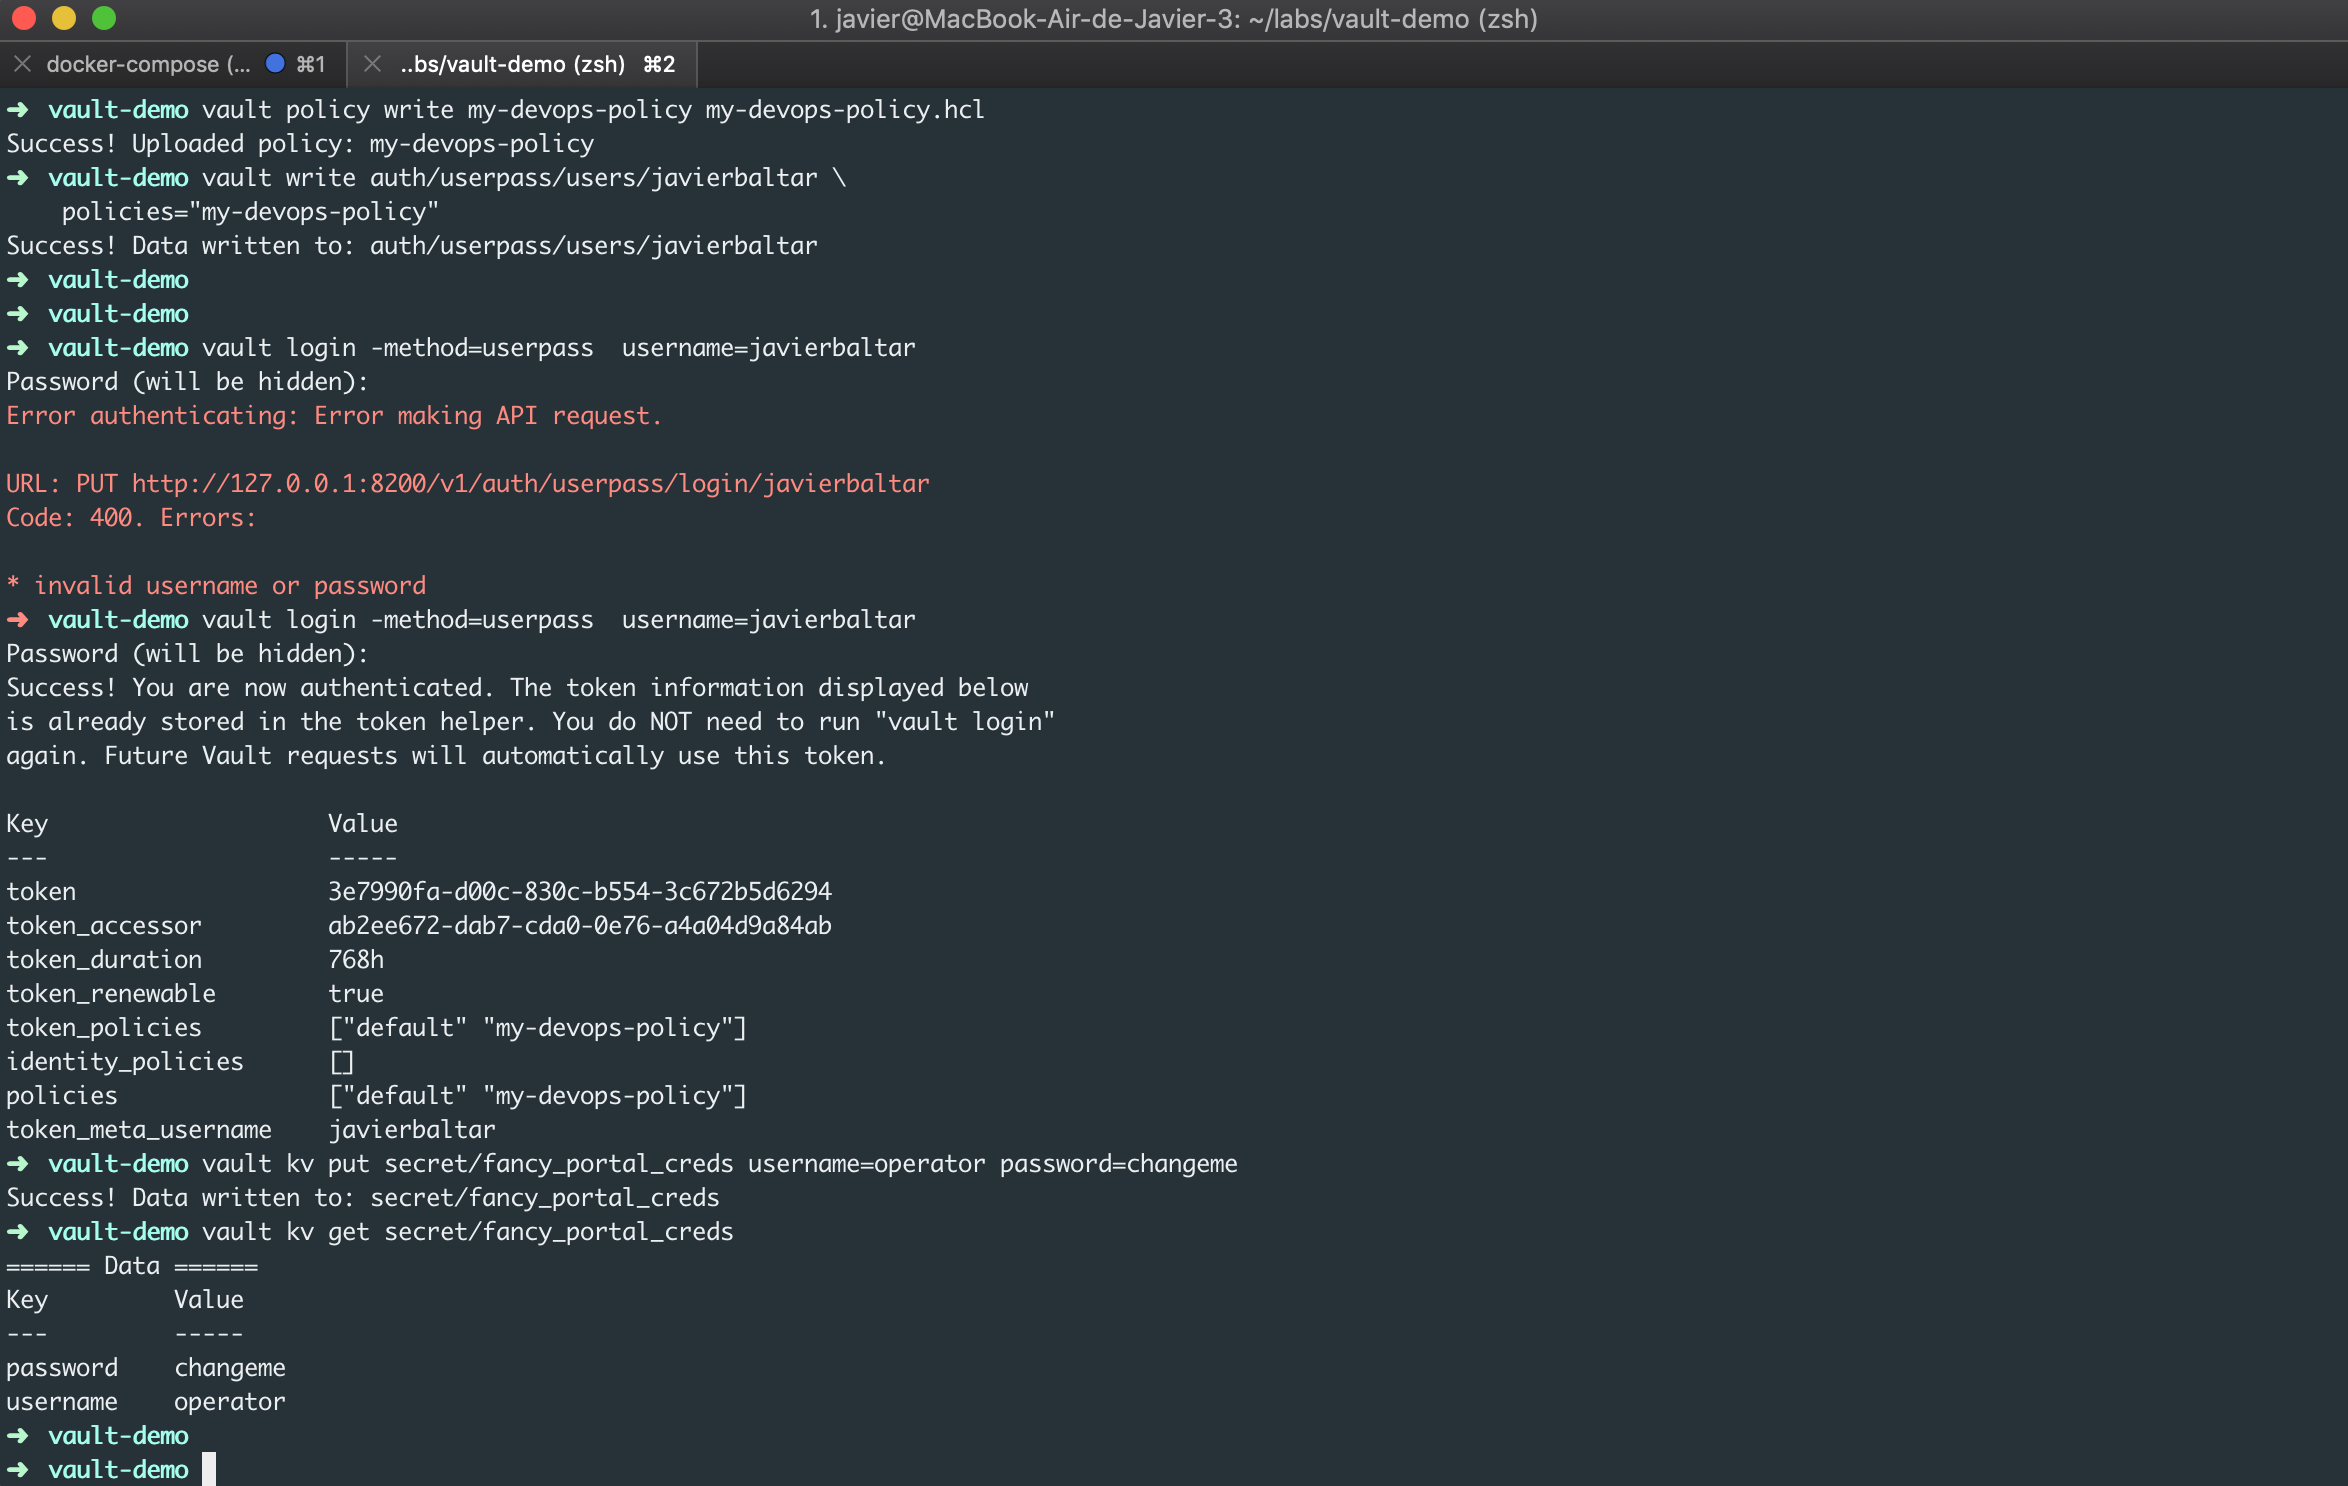
Once the policy is created, you can upload it to Vault as shown below:
vault policy write devops-policy my-devops-policy.hcl
Getting Secrets
If you are granted with the proper permissions, you can retrieve secrets issuing the following command:
vault kv get secret/fancy_portal_creds
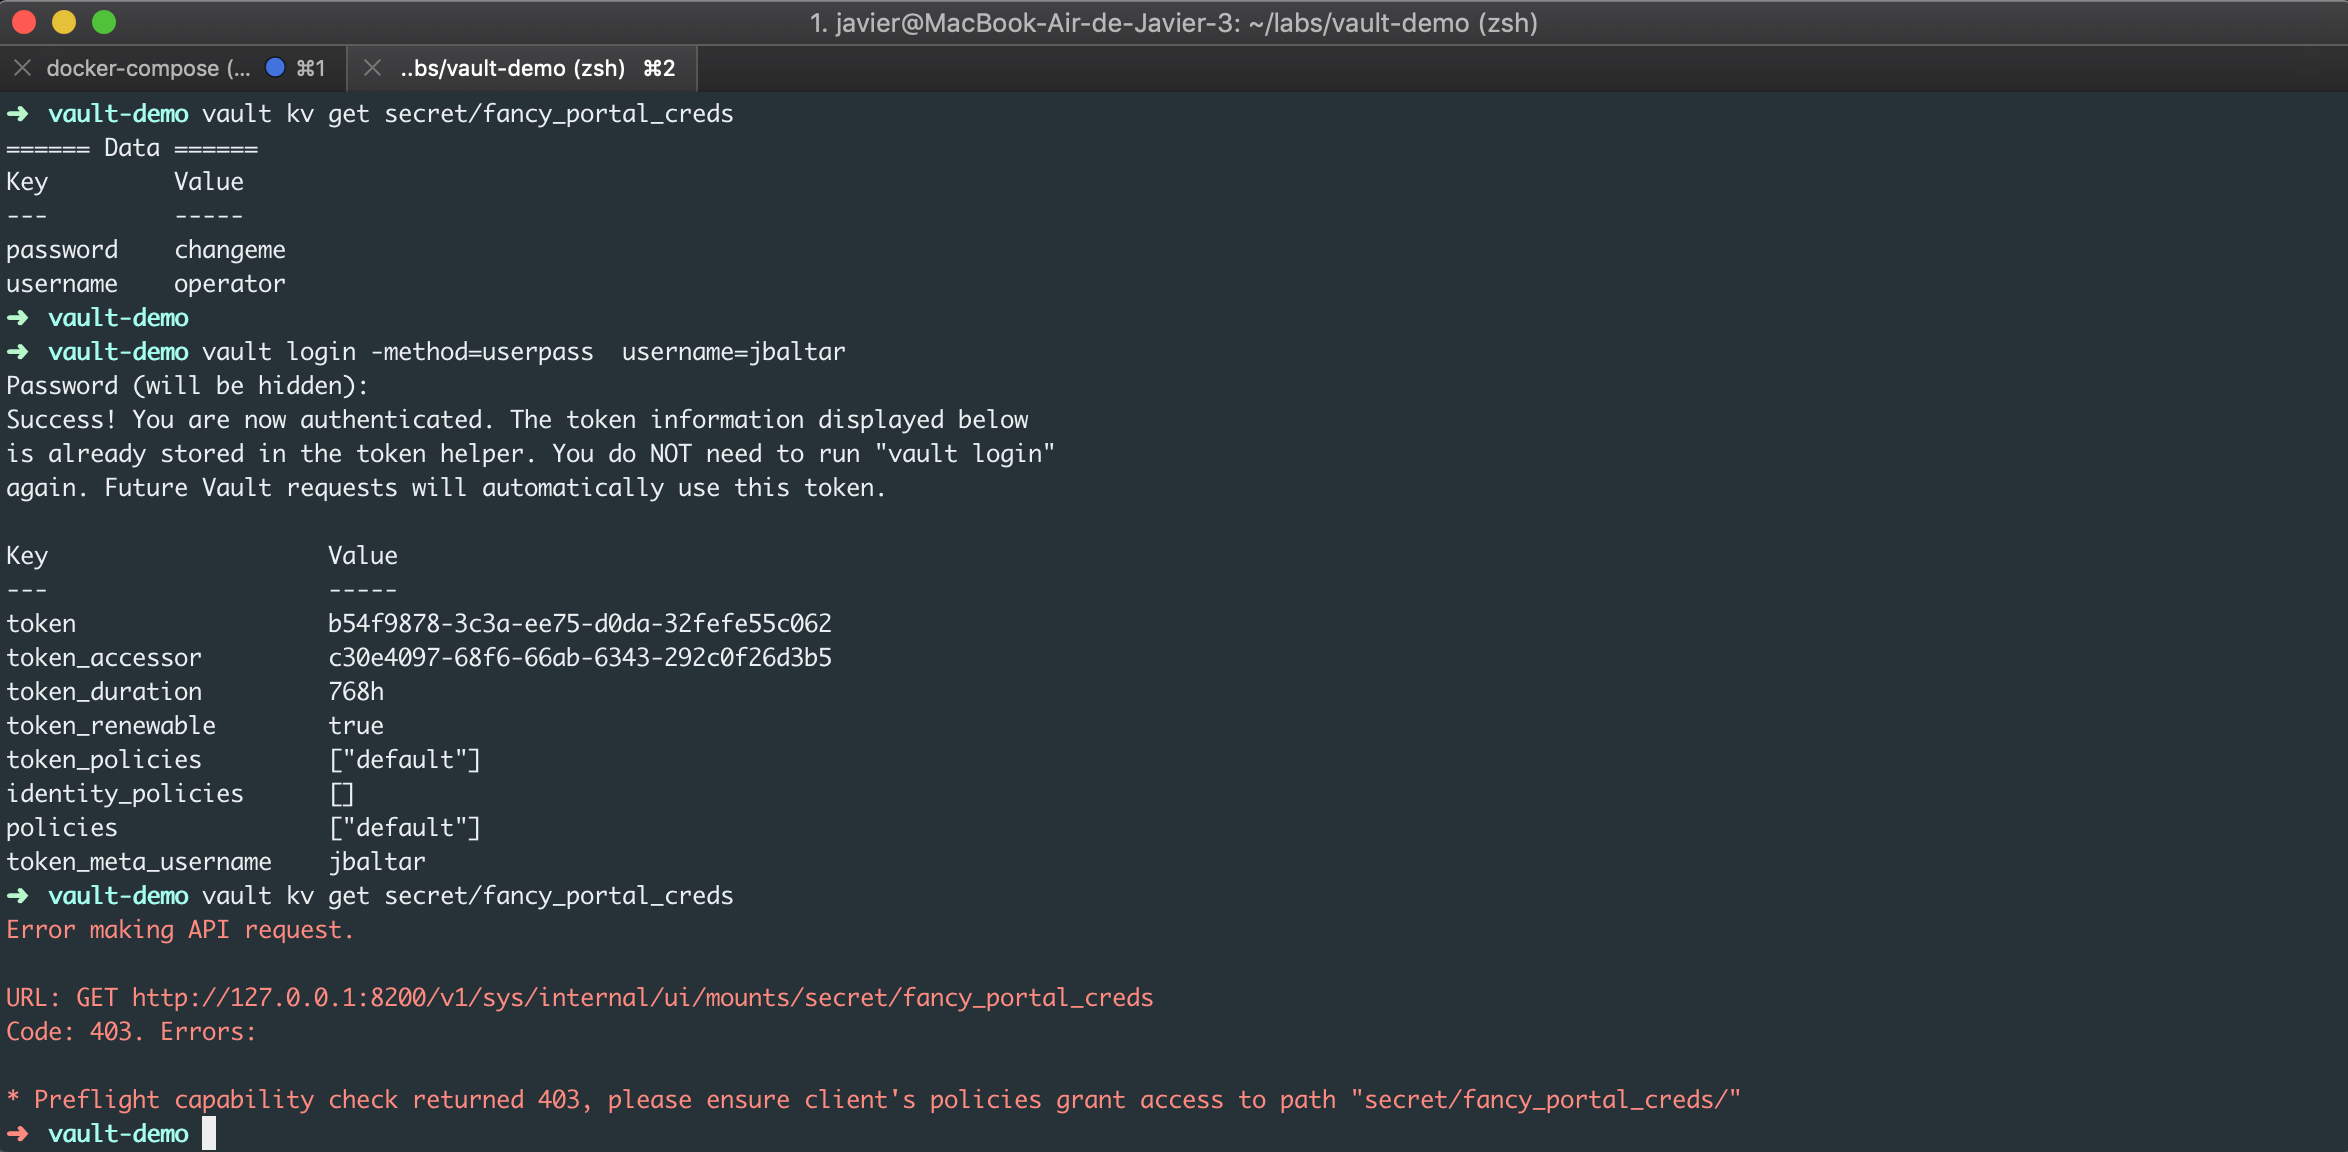
Similarly, secrets are accessed via GUI as shown below:

Documentation
Please find further details at: https://learn.hashicorp.com/vault/